


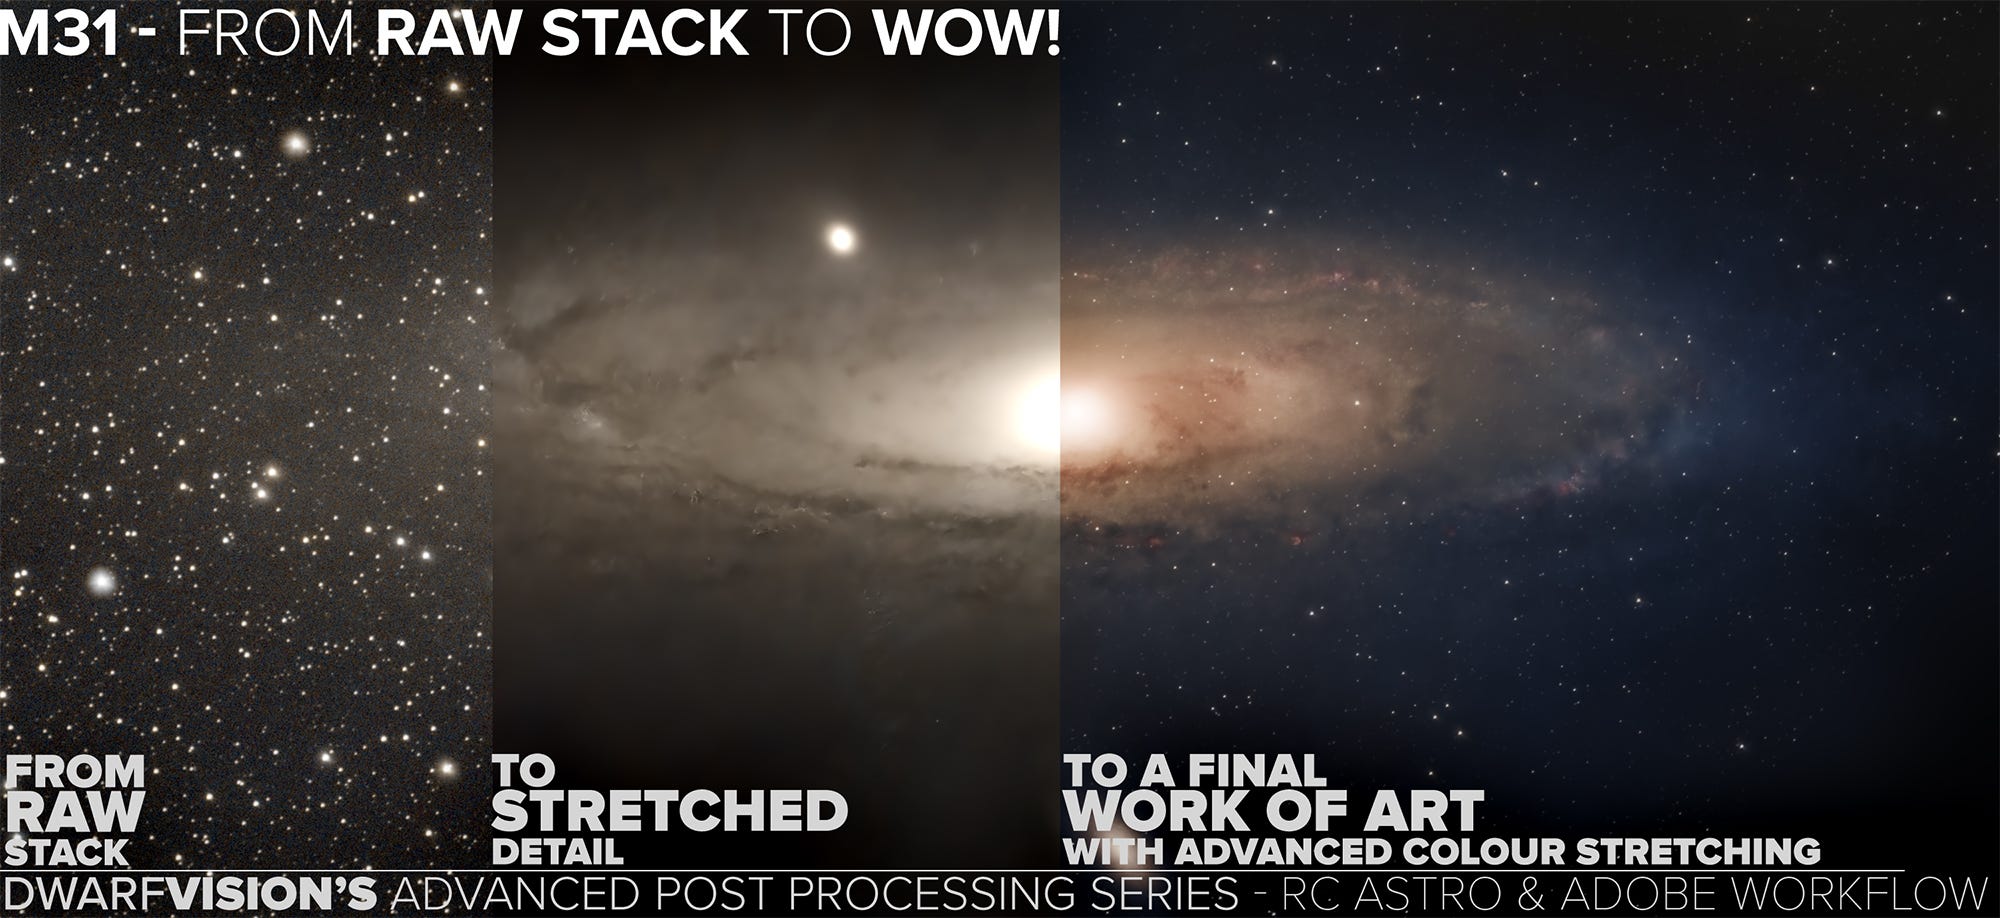
Andromeda's M31 - From RAW Stack to WOW!
DwarfVision’s Advanced Post Processing Series - RC Astro & ADOBE Workflow

Welcome, Astro-nuts, DWARF-wranglers, and Process junkies (like me)!
As Autumn is just around the bend, and that deep sky wonder of wonders is rising in the sky, yes, we're talking about that queen of the night, our galactic neighbour: the Andromeda Galaxy, M31.
This guide is dedicated to transforming the raw .png file from your DWARF, Smart Scope, or Rig. Or even from your multi-session stack (like ours) into a final work of art, with a workflow powered by some of the best tools in the business: Russell Croman's software and the Adobe Creative Suite.
Here's the path we'll follow: from the raw data to star and starless separations to contrast & colour stretches, and finally to a spectacularly polished masterpiece.
Want to try your hand at processing the same data? Consider becoming a paying subscriber to access the complete, raw data files used in this article plus our Lightroom Presets for color and star removal!
For tips and tricks on capturing the perfect stack, be sure to check out our previous article, "From Frustration to WOW! The Ultimate DWARF SIRIL WORKFLOW."
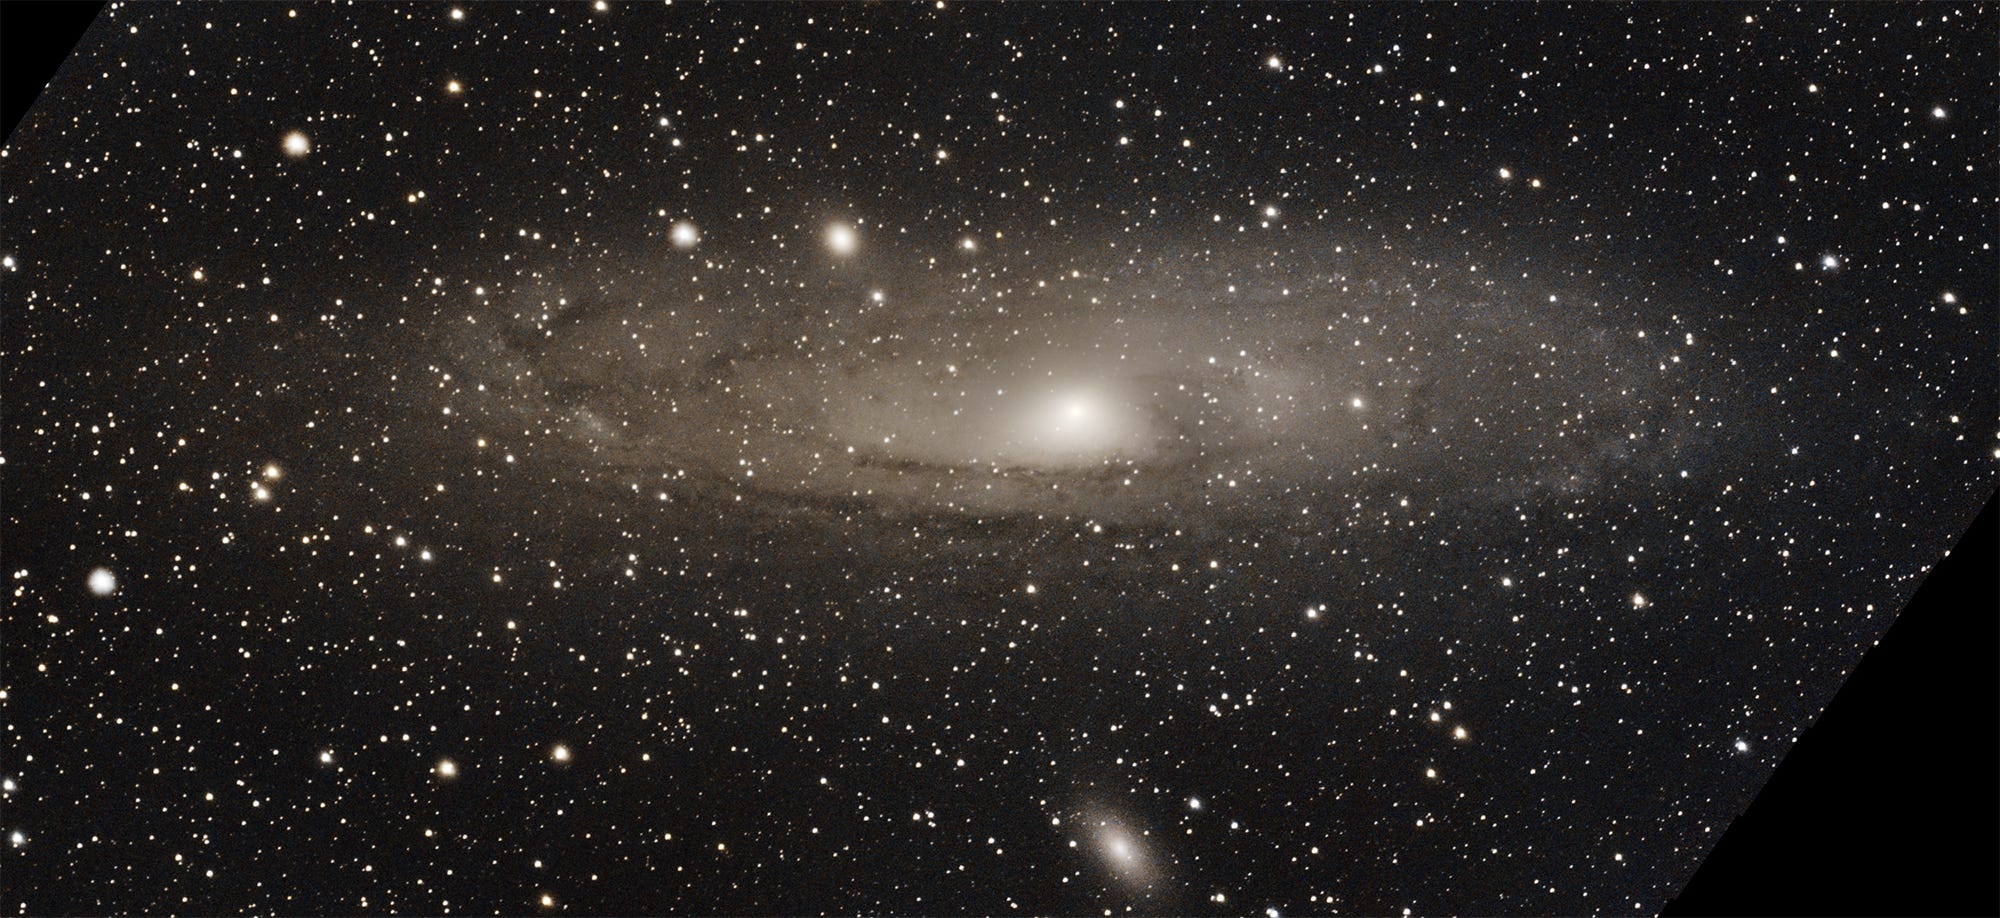
1. From Raw Stack
This is where every great astro-image begins. The "raw stack" is the unprocessed, linear file produced by your DWARF scope after a night of capturing and stacking. At this stage, the image is a dim, noisy, low-contrast file. The Andromeda Galaxy's bright core appears as a faint, slightly brighter smudge in the centre. The spiral arms and dust lanes are often just visible, obscured by bright stars and the mechanical noise from the sensor. This is a very common starting point, so don't be discouraged! This seemingly flat image contains all the fantastic information you need to create a stunning final photo. It's simply waiting to be unlocked.
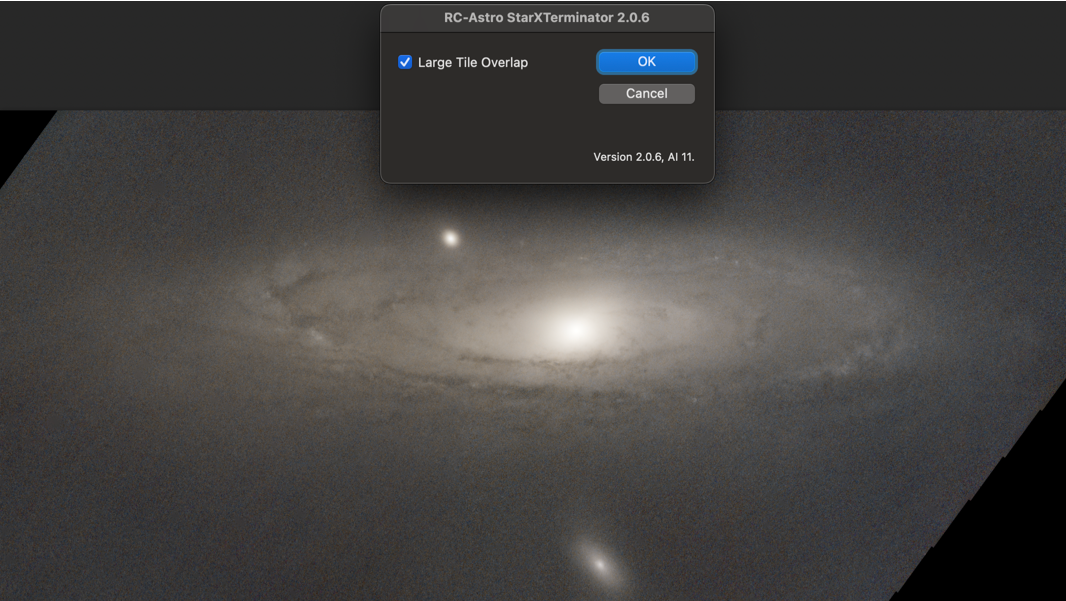
2. The “Starless” Stretched Detail
This is the most critical step in the entire post-processing workflow. The goal here is to perform a "stretch," a process that takes the faint, compressed data from your raw stack and expands it to reveal the incredible, hidden details of the galaxy. But you will find that when you do any adjustment to the raw stack, be it brightness/contrast, a curve, or level adjustment, the already bright stars become even more colourful and more bloated. This is why the first step is to apply star removal with RC Astro’s Photoshop plugin: StarXTerminator, to create a starless version of the image:
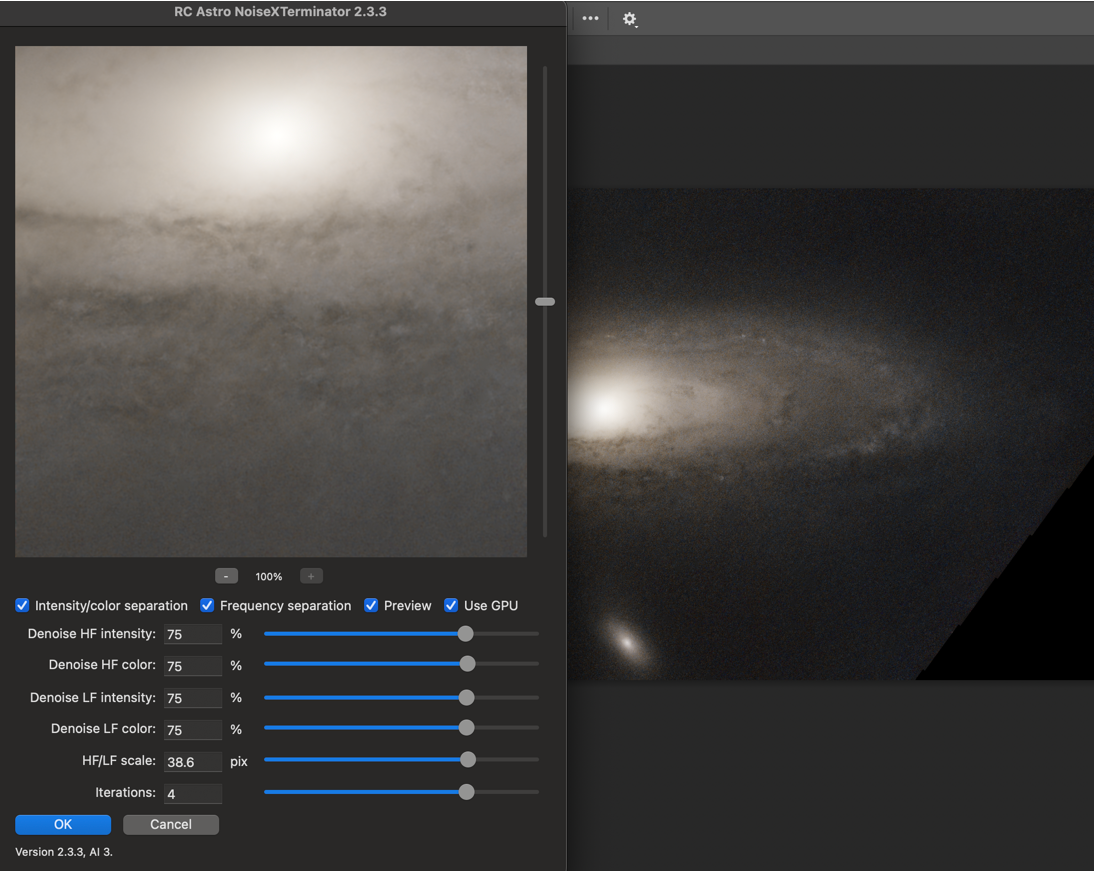
With the stars removed, the galaxy stands alone. Before you apply your first colour stretches to the image, it's crucial to perform a noise removal pass using RC Astro's NoiseX. This will smooth out any lingering sensor noise and prepare the data for stretching. Once the noise is cleaned up, you can begin applying gentle yet firm contrast adjustments to the image using Curves and Levels in Lightroom & Photoshop.
As you do, the delicate spiral arms and the intricate dust lanes within them will slowly emerge from the darkness, revealing the full breadth of the galaxy. You will notice that the core is still a bright, featureless blob, but with the stars now removed, the focus of this step is on revealing the hidden detail in the spiral arms and the faint outer regions.
Additional step: For an even sharper image, be careful here as it can get TOO sharp and start to look unreal, is to use Topaz’s free (with email registration) sharpening tools at https://app.topazlabs.com/enhance/denoise
3. Mastering the Image in Lightroom
Now that you have your beautifully stretched image, it's time to refine the colour and light to create a polished, professional-looking image. This is where we bring in the advanced tools and techniques in the Adobe suite, specifically Lightroom.
We start by addressing that bright, blown-out core. The first step is to carefully adjust the Light panel in Lightroom to get the initial tone and contrast just right.
Exposure: +0.14
Contrast: +30
Highlights: -100
Shadows: +91
Whites: -47
Blacks: -83
These settings are designed to "clip" the bright core and bring back its detail. The Highlights, Whites, and Blacks sliders are crucial for this. Once those are set, we turn to the Curve panel, where we apply a classic "S" curve. This adjustment increases the overall contrast by making the darks darker and the brights brighter, which makes the galaxy stand out against the background of space.
Next, we move to the Colour panel. Here, the goal is to enhance the subtle colours of the galaxy. The white balance should be set to a custom setting, adjusted to your taste. You can also make slight adjustments to the colour balance, bringing out the distinct colours of the galaxy's spiral arms and core.
Become a paying subscriber and you can get my personal Lightroom preset for M31 to get a perfect starting point for your own edits! (below the paywall)

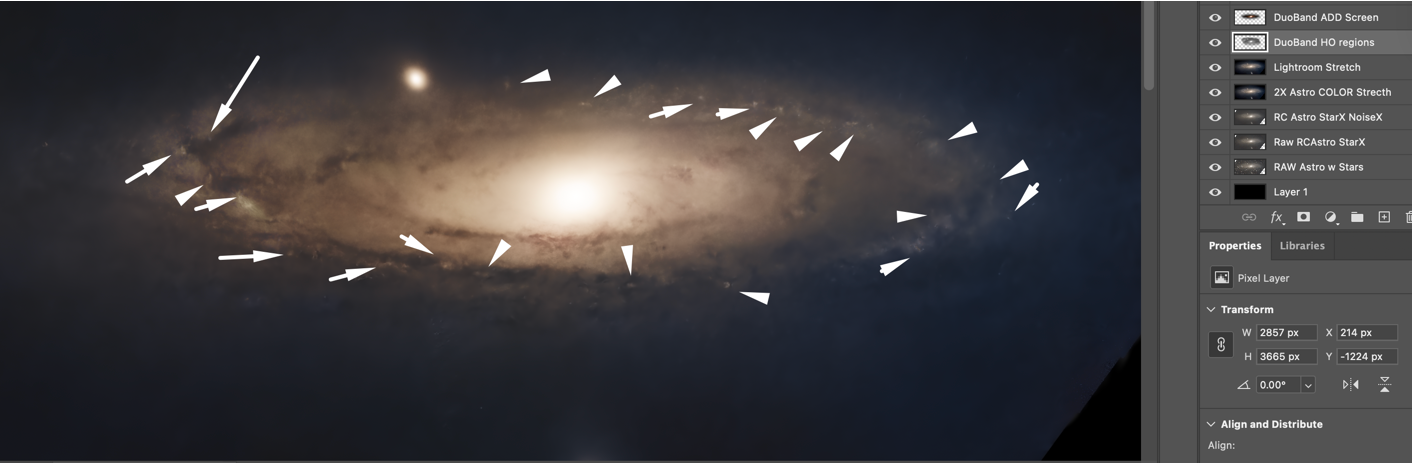
4. Adding the Secret Sauce in Photoshop
With your Lightroom stretch complete, it's time to add a final layer of scientific and artistic detail in Photoshop. This is where you can bring your Dual-Band data to life. By layering your Dual-Band stack in with your Astro stack as a LUMINOSITY layer, you'll uncover the hidden pockets of Hydrogen-Alpha and Oxygen III nebulae—the vibrant star-forming regions tucked within M31's majestic spiral arms.
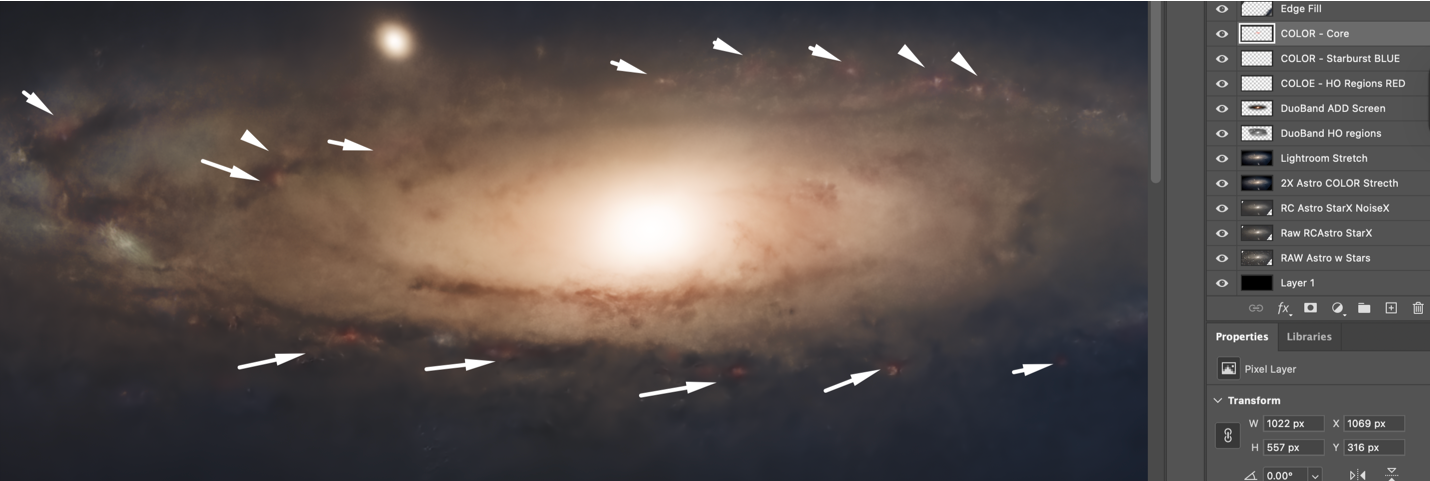
5. Colour Touches
Now that you've revealed the hidden details, you can add some artistic colour to them. Using a "Colour" layer, you can now use a red/pink paint brush set at about 30% opacity and flow to add a touch of colour to these new details.
To balance the red of these nebulae, I like to add a touch of blue to the star fields for a balanced colour palette.
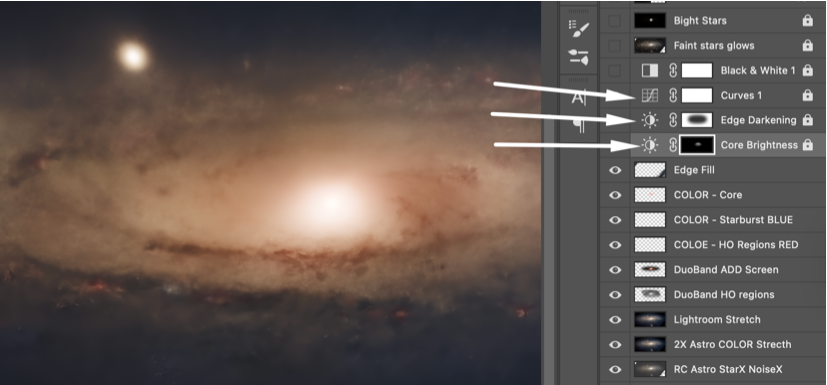
6. Adjusting the Core
With the colours in place, it’s time to take on the blown-out core. To do this, you will use Adjustment Layers in Photoshop. This non-destructive process allows you to adjust the brightness and contrast of the core while preserving all the details you’ve captured.
Core Brightness: Create a new brightness adjustment layer, name it "Core Brightness," and create a very tight selection around the core. This will allow you to reduce the overall brightness of the core without affecting the rest of the galaxy.
Edge Darkening: Create another “brightness” adjustment layer, name it "Edge Darkening," and apply a gentle curve to darken the outer edges of the galaxy; this, in turn, makes the inner areas of the galaxy appear brighter. This will help bring out more detail in the spiral arms and give the image a more polished look.
Curves: Finally, make any last-minute adjustments to the overall image using a Curves layer, which will allow you to fine-tune the colour and light balance.
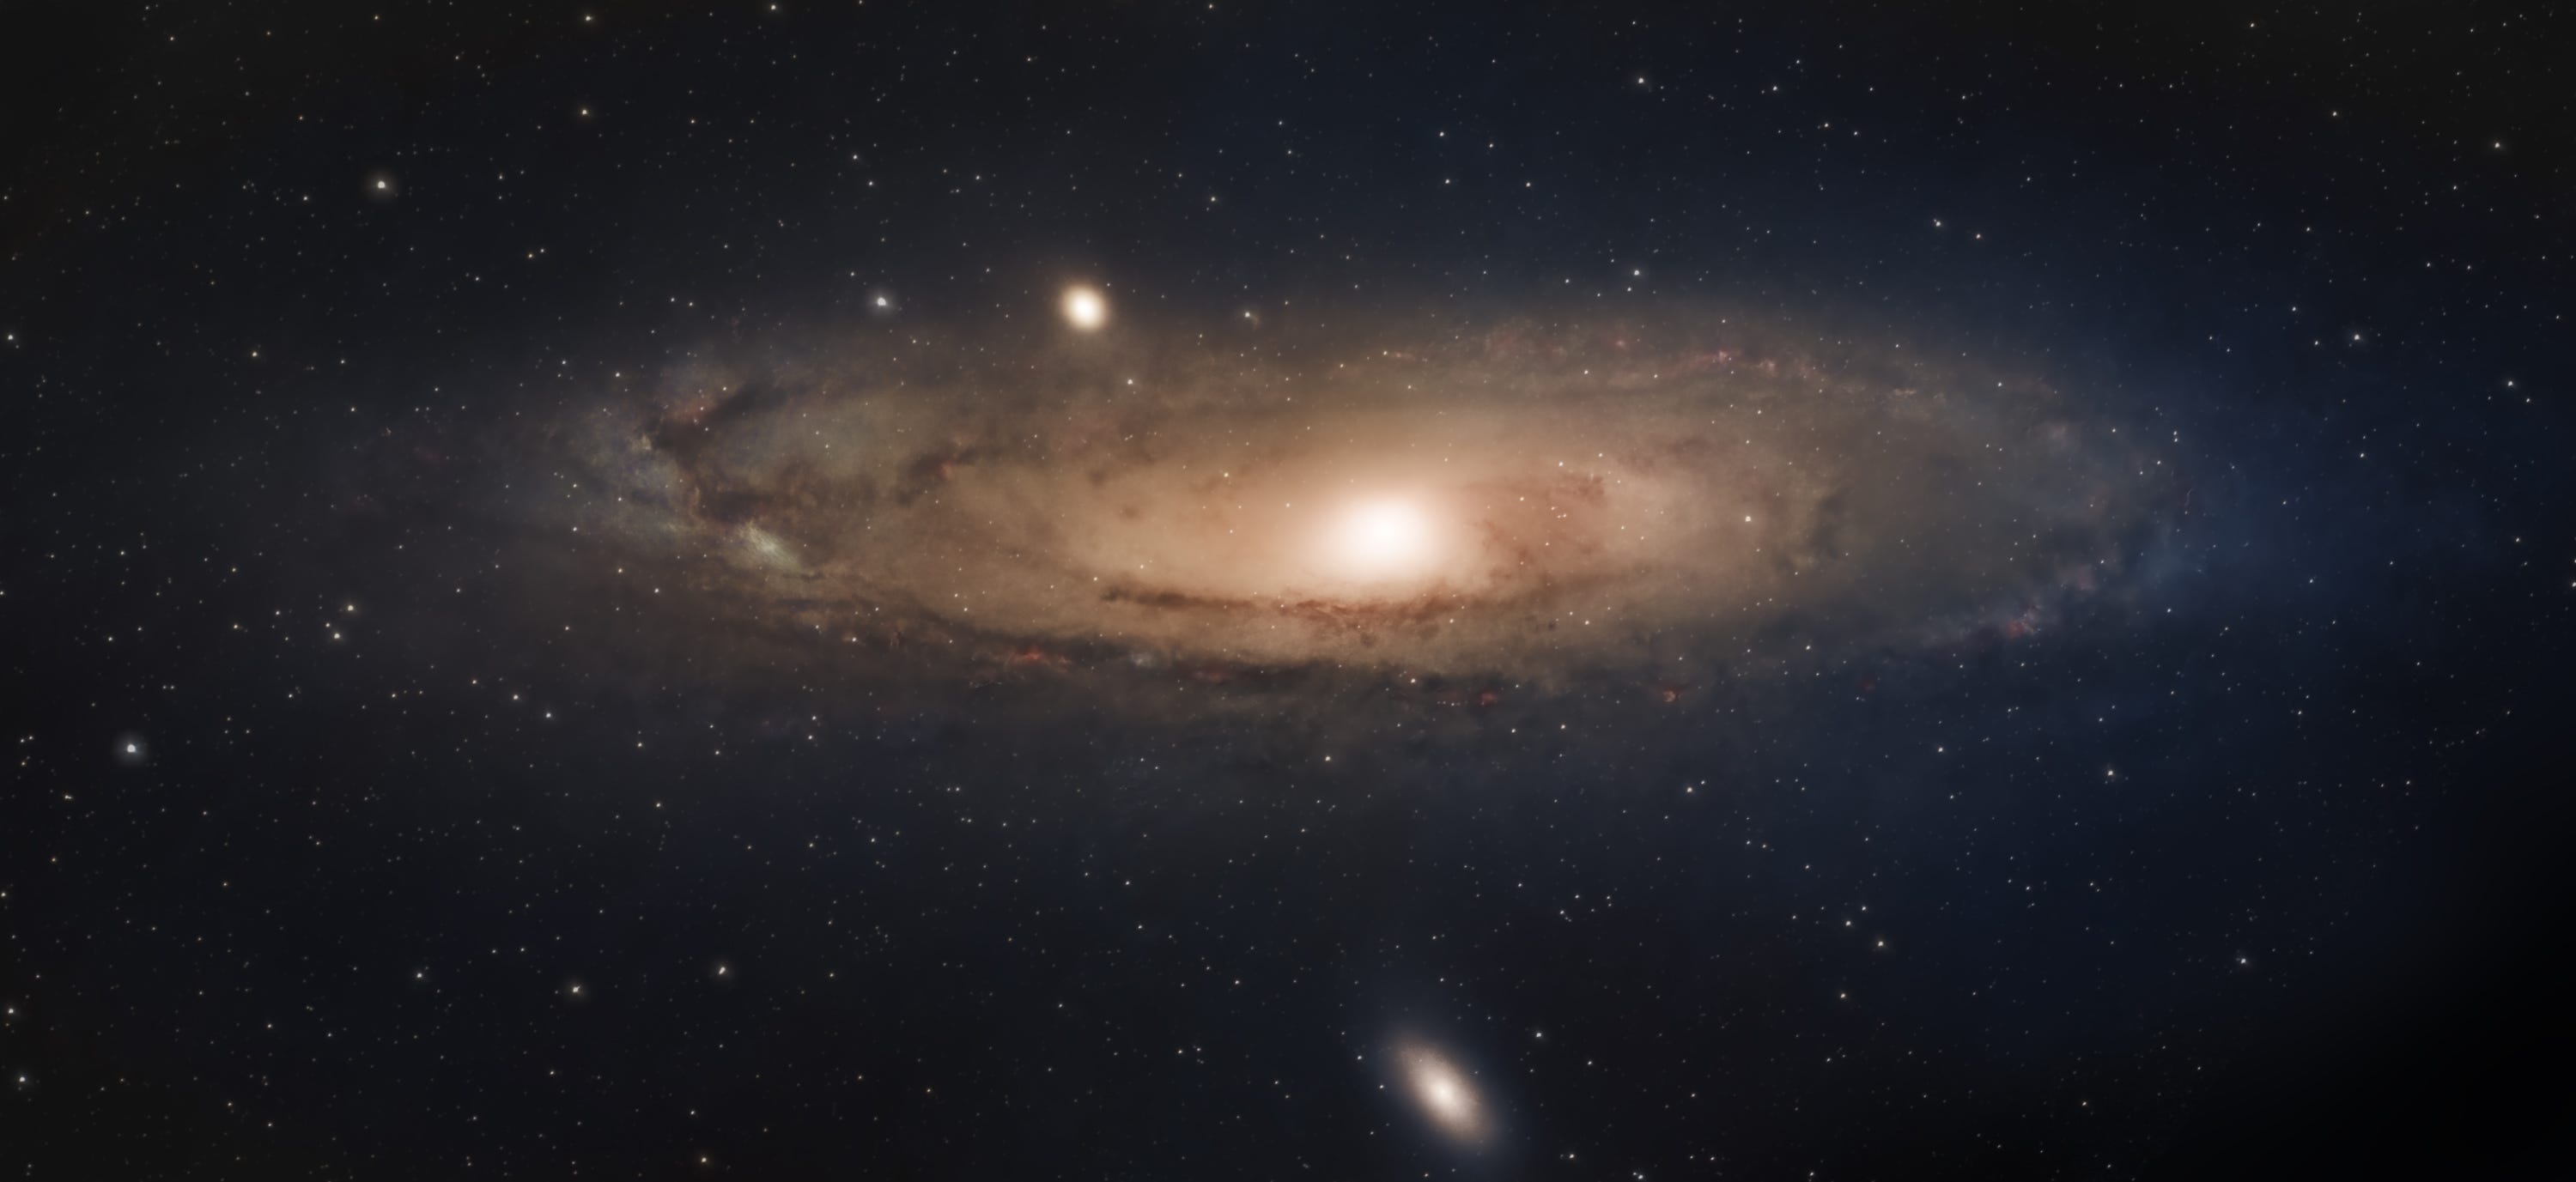
7. Bringing Back the Stars
Now that you have perfected your galaxy, it's time to bring back the stars. To do this, you can perform a stretch on the original raw file that eliminates the galaxy, leaving only the stars. You can then layer this star-only image back into your Photoshop document and set the blending mode to "Lighten" and/or "Screen". This will add the brilliant colour and detail of the stars back into your image without affecting the work you’ve done on the galaxy.
The result is an image that showcases the full scope of the Andromeda Galaxy, with a detailed core, clearly defined spiral arms, and stunning colour, all brought out from the initial flat data your DWARF Scope so skilfully captured, but you didn’t know was there!
Happy processing! & Clear Skies!
Duncan at DwarfVision
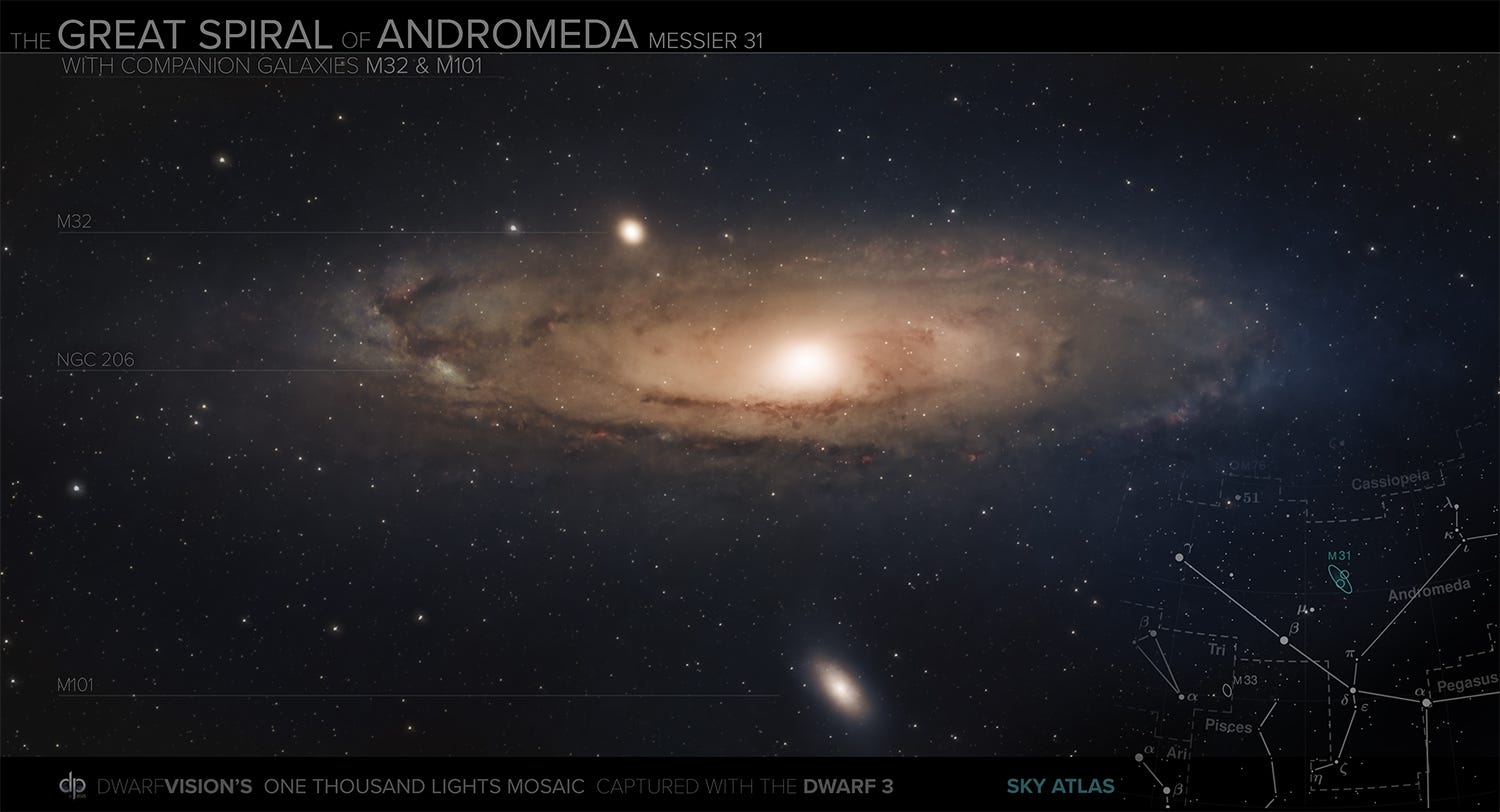
FREE for ALL subscribers - Our M31 Desktop poster:
Paying subscriber bonuses are below the paywall!
All of M31 data, including D3 ASTRO and DUALBAND stacks - Approx 15 hours of captured data.
Numerous SIRIL Processed Stacks as .fit & .PNG files ready for you to rock and roll with to practice, perfect, or enhance your captures!
Our Lightroom presets for stretching this amazing DSO.
Our thanks and dedication to you, to help you get the most out of your post-processing adventures!
Keep reading with a 7-day free trial
Subscribe to DwarfVision to keep reading this post and get 7 days of free access to the full post archives.