

MAKE THE SHOT: The Art of Layering the Moon
DWARF CREW EXCLUSIVE! Get our SIRIL Moon & Planetary stacking guide, plus an exclusive DATA CLUB download of all our moons to use in your creations!


Hey Astro-nuts and DWARF-wranglers,
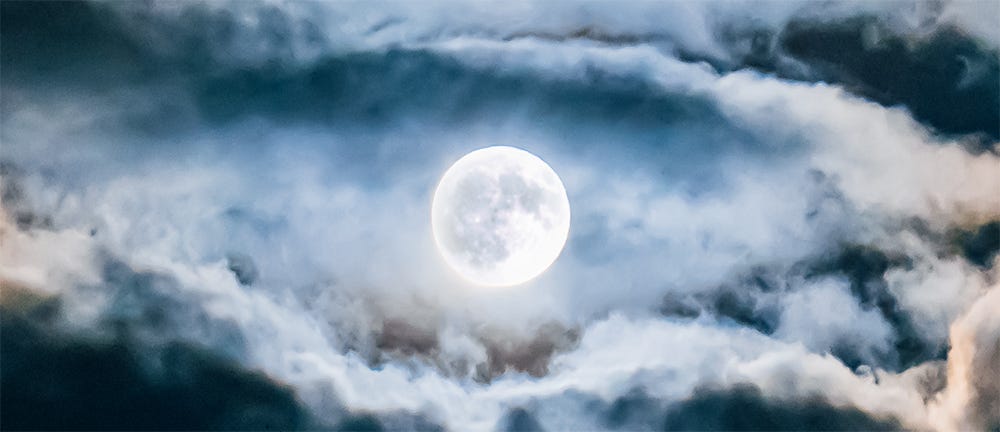
Have you ever looked at a stunning photo of the Moon hanging perfectly over a mountain peak or peeking through ethereal clouds and wondered, "How did they do that?" While our DWARF scopes capture incredible raw detail, the secret to creating those truly breathtaking, artistic lunar images often lies in the final edit.
The truth is, a single exposure can rarely do justice to both the intricate details of the Moon's surface and the subtle beauty of a landscape or sky. To create a masterpiece, you need to blend different elements, and the key is mastering layers in photo editing software.
Upgrade your subscription to paid to download our exclusive Moon Stacking SIRIL GUIDE , PHOTOSHOP POST-PROCESSING, & SIRIL GUIDE, all of our moons to use in your projects, and our support for your shooting, stacking, and processing adventures!
This post will give you a quick, powerful guide to the fundamental techniques used to create these composites. This is the core trick used by professionals to create stunning lunar composites in layer-based software like Adobe Photoshop, Affinity Photo, or the free alternative, GIMP. The technique you use depends on your starting image.
Scenario 1: You Have an Overexposed Moon
This is common when you expose for a landscape or clouds at night. The Moon is present but is a bright, featureless blob. Your goal is to bring back the detail.
The Trick: Place your perfectly exposed, detailed Moon image (from your scope or re-stacked in Siril, see more on that below!) as a new layer on top of your landscape/cloud photo. In the Layers panel, change the Blend Mode of this top layer. Experiment with these modes to see which looks most realistic:
Darken
Multiply
Color Burn
These modes allow the darker, detailed parts of your new moon to "burn through" the overexposed blob underneath, creating a seamless and natural-looking replacement.
Scenario 2: You're Adding the Moon to a Scene
Sometimes you have a perfect night landscape, but the Moon wasn't in the frame. Here, you want to add your detailed Moon to a dark sky.
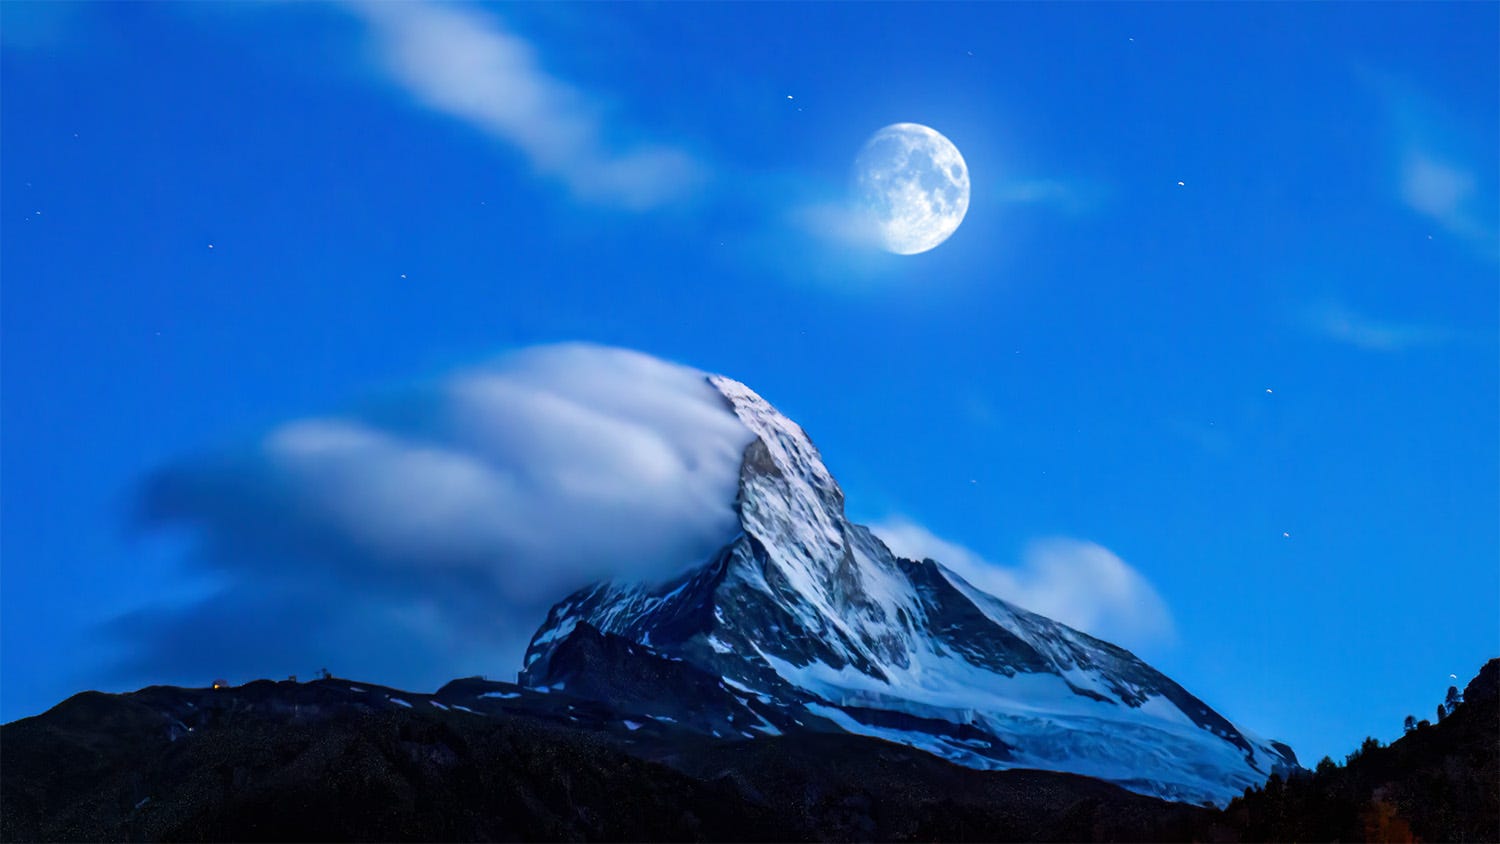
The Trick: Again, place your detailed Moon image as a top layer. Since your Moon image has a black background, you want to use Blend Modes that hide black and only show the bright pixels. Your best options are:
Lighten
Screen
Color Dodge
The Screen mode is often the perfect one-stop solution for this, instantly making the black background disappear and leaving only the Moon floating in your sky.
The Pro-Touch for Realism: In all cases, use a “Levels” adjustment on your Moon layer (a non-destructive adjustment layer or mask is best!) to match its brightness and contrast to the surrounding scene perfectly. Always look up reference photos to ensure your final composite looks as realistic as possible!
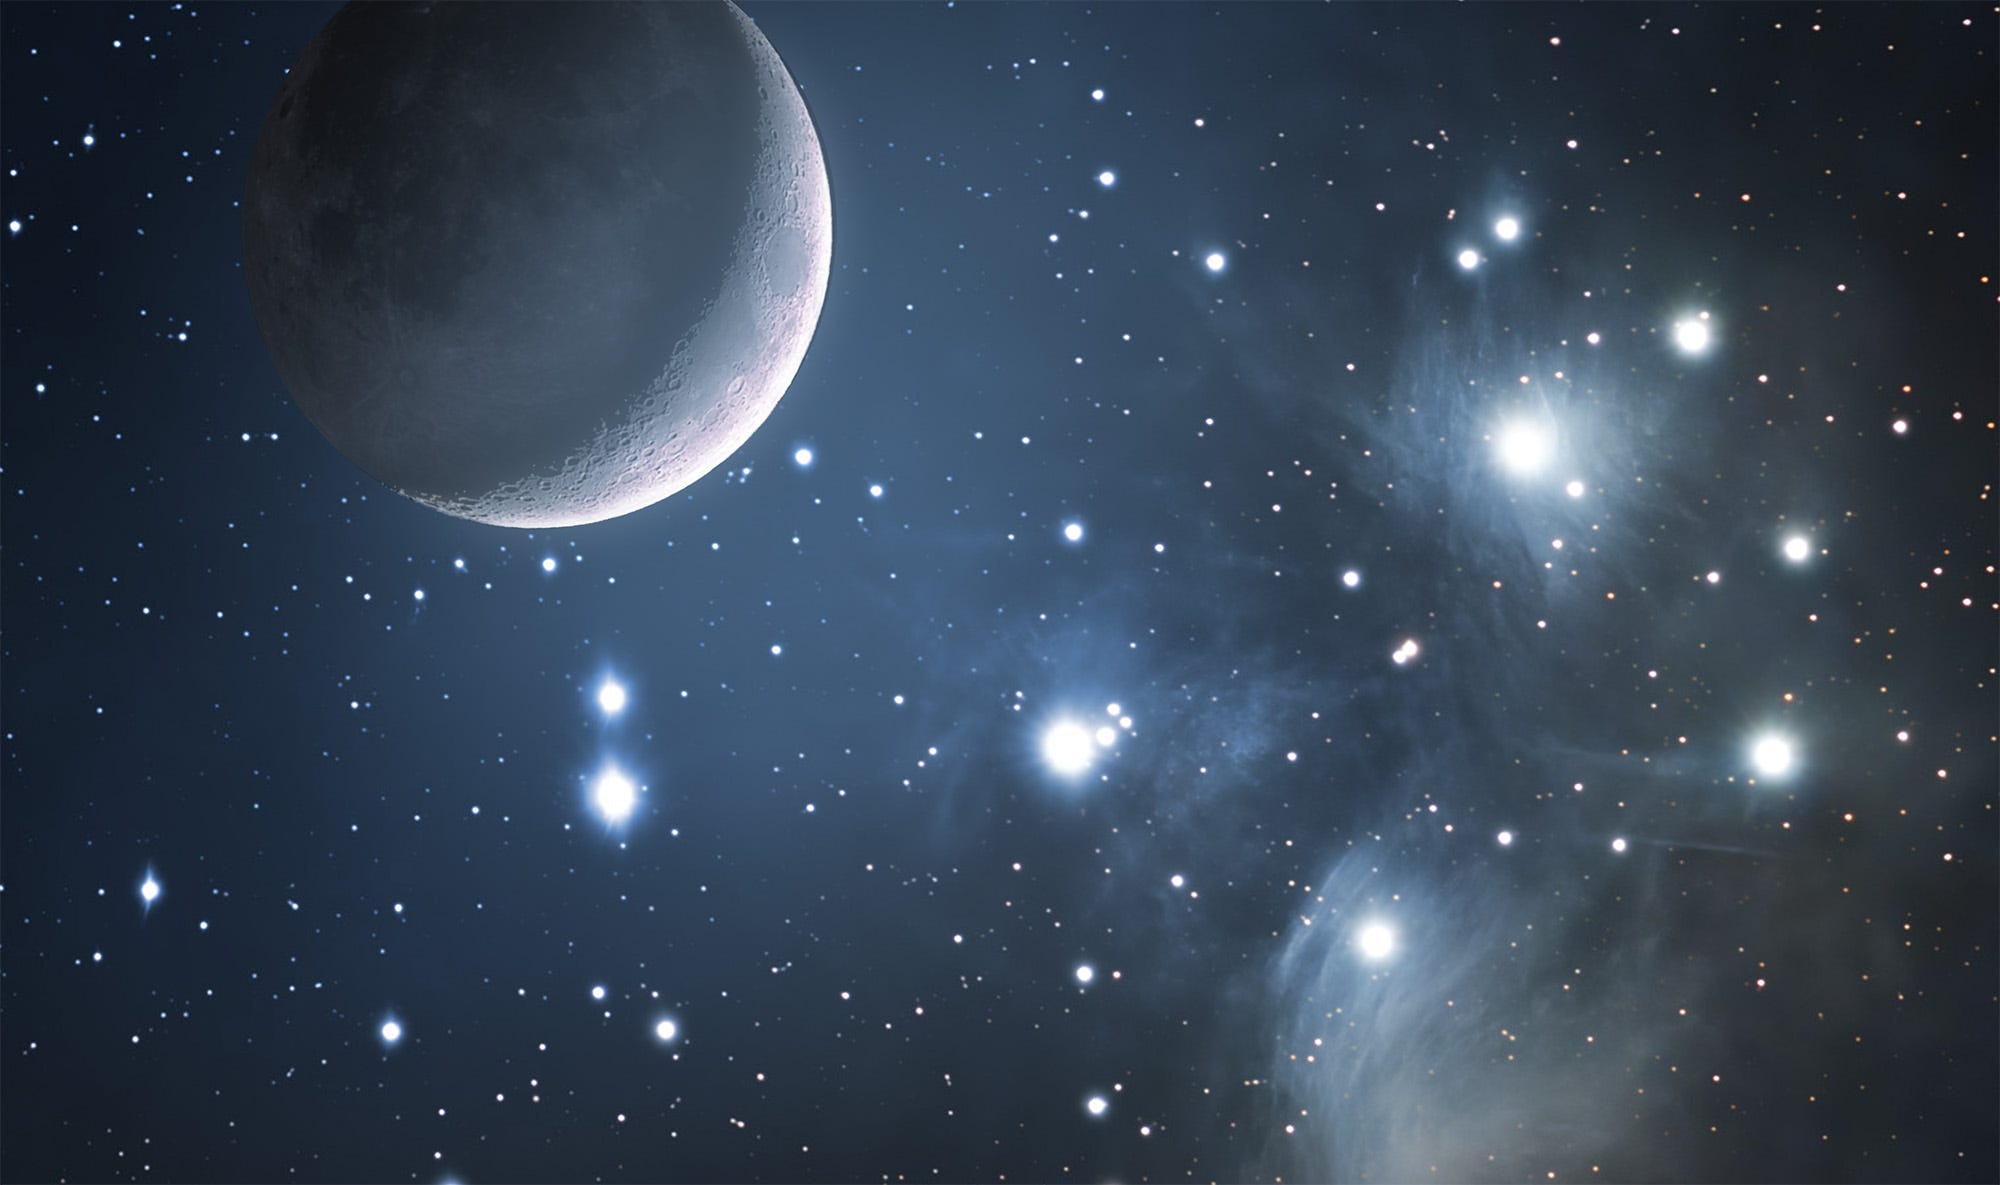
Scenario 3: You're Adding the Moon to a Scene with Stars
If the scene is star-studded, then screening on the moon may not be the best bet, as the stars will shine through it. Here, the best approach is to use a round circular selection sized to the moon, place this circle on a layer below the moon with a darken adjustment layer, and fill it with the darkest sky colour near the moon. Then you can screen the moon onto this circle. This allows the moon to blend with the sky colouration, while keeping the stars from peaking through.
Ready to Go Deeper? Our Exclusive Moon Stacking SIRIL GUIDE is below!
The tips above are the secret to creating beautiful final composites, but they rely on one crucial ingredient: a perfectly sharp, detailed, and noise-free master image of the Moon to work with.
And the absolute best way to create that master image is by stacking your raw .fits files in Siril.
You've just learned the professional technique for creating stunning composite moon photos. But this method relies on one crucial ingredient: a perfectly sharp, detailed, and noise-free master image of the Moon to work with.
What if your DWARF scope only stacked a few of your shots, or marked some of your best ones as "failed"?
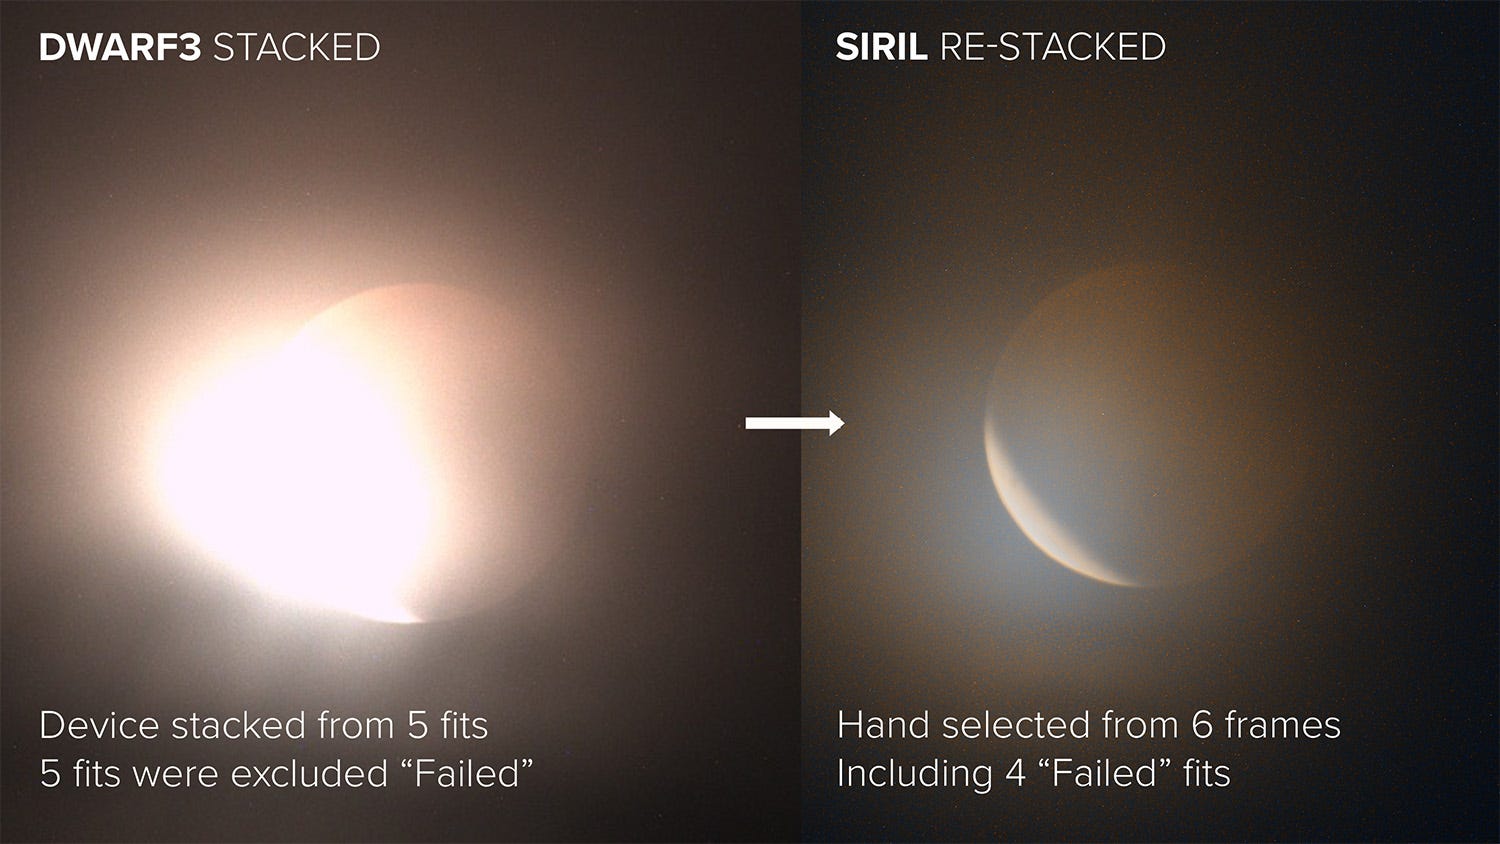
That's where our new, exclusive guide for CREW members comes in. We'll show you how to take back control with Siril, rescuing every last bit of data you captured and stacking it into a flawless master image. Upgrade your subscription to get the complete step-by-step tutorial, plus instant access to our new Moon Data Drop, and turn your lunar snapshots into masterpieces.
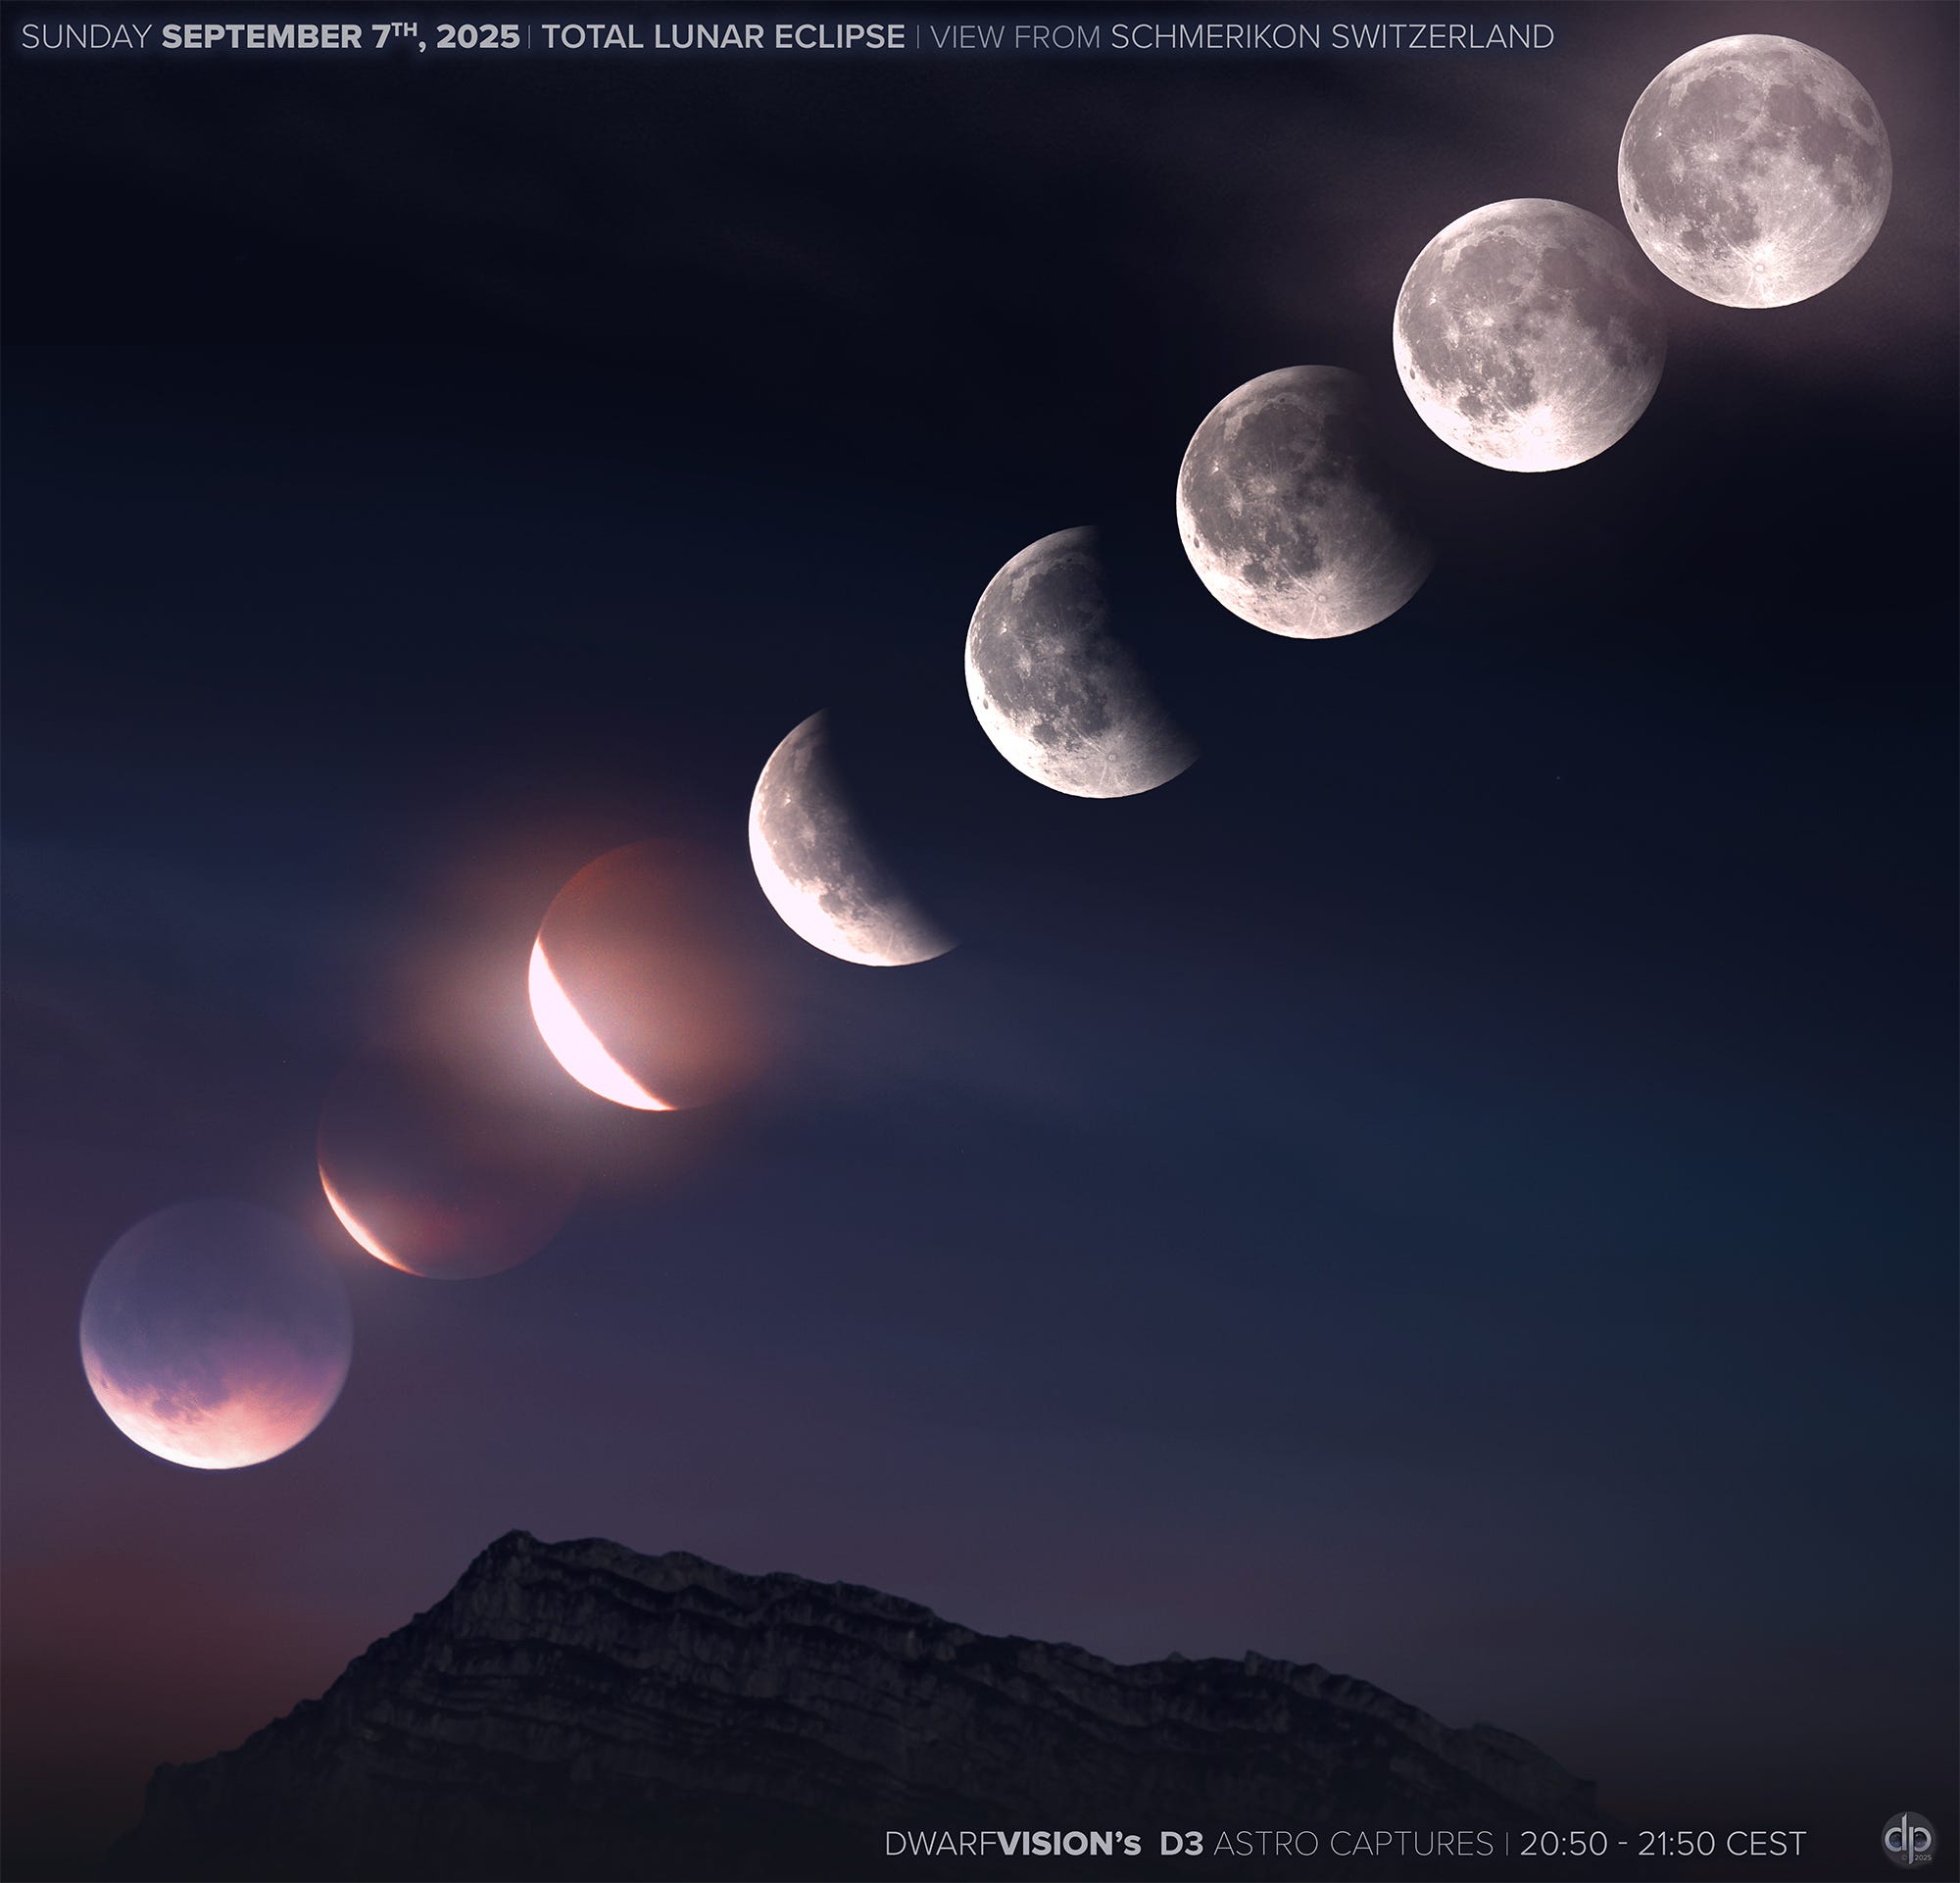
Get our FREE Eclipse Poster!
If you haven't already, sign up for our free Newsletter, and you'll receive the full-size poster to download in our welcome email:
Clear Skies!
Duncan from DwarfVision
Keep reading with a 7-day free trial
Subscribe to DwarfVision to keep reading this post and get 7 days of free access to the full post archives.